Or go to our Shopify Theme Detector directly
How To Add Sub Collections In Shopify
Last modified: November 9, 2023

Sub collections, or categories are an important part of online shopping. You can organize products into numerous categories, but when you have a large catalog, customers might want to be specific. For instance, they might be looking for a boy’s shirt for a child who is under five. This could be a sub collection.
By offering sub collections to your customers, you should be able to build on revenues and improve conversion rates. This is through better shopping experiences and making it quicker for customers to shop on your online store. At the same time, it can be better for management of your store. If you have sub collections, you can find it easier to make changes to products.
| # | Name | Image | |
|---|---|---|---|
| 1 |

|
Lezada- Multipurpose Shopify Theme
|
|
| 2 |

|
Multikart- Multipurpose Sections Shopify Theme
|
|
| 3 |

|
Handy- Handmade Shop Shopify Theme
|
|
| 4 |

|
Classy Missy – Fashion Store Shopify Theme
|
|
| 5 |

|
Kaline – Multipurpose Responsive Shopify Theme
|
|
| 6 |

|
Airy - Drones Store Shopify Theme
|
|
| 7 |

|
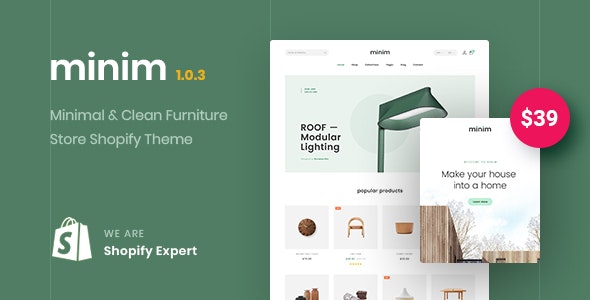
Minim – Minimal & Clean Furniture Store Shopify Theme (Mobile Friendly)
|
|
| 8 |

|
NexGeek - Multipurpose Responsive Shopify Theme
|
|
| 9 |

|
Avenue
|
|
| 10 |

|
Spark
|
|
|
Show More
|
|||
Creating A Sub Collection On Your Shopify Store
It isn’t as easy to create a sub collection in Shopify as just making one. However, it is possible. What you need to do is to add tags to your Shopify products and then allow your products to be filtered out based on what tags the customer wants.
To do this, you will need to follow the steps below.
Step 1 – Login To Your Shopify Store
First thing you need to do is to login to your Shopify store, using your credentials.
Step 2 – Products
Then go to your products page and check that every product has tags. Products can have numerous tags, and therefore, products can be in numerous sub collections.
Step 3 – Theme Settings
Many themes have the option to enable a drop-down menu to filter collections based on the product tag. But you need to check that the theme you’re using has this setting. To do this, go to your ‘Online Store’ and then ‘Themes’ before finding the theme editor and navigating to the collection page in the theme preview.
When viewing the collection page, you should see the ‘Collection Pages’ tab in the theme editor. Click on the ‘Collections page’. If your theme includes the option to enable filtering by tag, then there will be an option that reads something like ‘Enable Filtering By Tag’ and a checkbox next to it. Check the box and then click on ‘Save’. This should enable the filtering and create sub collections for your store.
Step 4 – Adding Code
Not every theme has this option. If this is the case, then you need to add some code to your theme files to add this option. To do this go to your theme that you want to edit in the ‘Themes’ option on your Shopify store admin page.
Then click on ‘Actions’ and then ‘Edit Code’
Step 5 – Templates
Find the templates directory and click on the collection.liquid file.
Step 6 – Adding The Code
In the location where you would like to add the drop-down menu to appear on the collection page, add the following code.
      <div class="clearfix filter">
  <p>Browse by tag:</p>
  <select class="coll-filter">
    <option value="">All</option>
    {% for tag in collection.all_tags %} {% if current_tags contains tag %}
    <option value="{{ tag | handle }}" selected>{{ tag }}</option>
    {% else %}
    <option value="{{ tag | handle }}">{{ tag }}</option>
    {% endif %} {% endfor %}
  </select>
</div>

<script>
  /* Product Tag Filters - Good for any number of filters on any type of collection pages */
  var collFilters = jQuery('.coll-filter');
  collFilters.change(function() {
    var newTags = [];
    collFilters.each(function() {
      if (jQuery(this).val()) {
        newTags.push(jQuery(this).val());
      }
    });
    if (newTags.length) {
      var query = newTags.join('+');
      window.location.href = jQuery('{{ 'tag' | link_to_tag: 'tag' }}').attr('href').replace('/' + 'tag', '/' + query);
    }
    else {
      {% if collection.handle %}
      window.location.href = '/collections/{{ collection.handle }}';
      {% elsif collection.products.first.type == collection.title %}
      window.location.href = '{{ collection.title | url_for_type }}';
      {% elsif collection.products.first.vendor == collection.title %}
      window.location.href = '{{ collection.title | url_for_vendor }}';
      {% endif %}
    }
  });
</script>
Step 7 – Save
Save your work when you’re complete.
Enhancing Your Shopify Store with Sub Collections
Organizing Products for Better Navigation
Sub-collections refine your store’s structure, leading customers smoothly to their desired products.
This organization not only simplifies browsing but also enhances the shopping experience. By grouping similar items, customers find what they need with ease.
SEO Benefits of Sub-Collections
Sub-collections can boost your SEO by creating targeted landing pages.
This structure helps search engines understand your store, potentially lifting your rankings. It’s a strategic way to align your products with customer searches.
Inventory Management and Marketing
Sub-collections aid in managing inventory by categorizing items, making it easy to track stock levels.
They also enable targeted marketing campaigns, allowing for promotions based on customer preferences and product popularity.
Setting Up and Customizing Sub Collections
Starting with Shopify
Before adding sub-collections, ensure your Shopify store is active. Familiarize yourself with the dashboard to use its features effectively.
This preparation is key to a smooth setup of sub-collections.
Creating and Assigning Products
Create main collections first, then add sub-collections within them.
Assign products to these sub-collections to make your inventory more accessible and organized for customers navigating your store.
Personalizing the Shopping Experience
Customize sub-collections to match your brand. Use appealing images and optimize product descriptions.
Consider showcasing sub-collections on your homepage for better visibility and easier customer access.
Considerations for Adding Sub Collections in Shopify
Store Layout and User Experience
When integrating sub-collections, consider your store’s overall layout. A logical flow leads to a better user experience.
Ensure sub-collections are intuitive and enhance the site’s navigability.
SEO Strategy and Keyword Integration
Sub-collections should align with your SEO strategy. Incorporate relevant keywords to improve search visibility.
This approach can drive more targeted traffic to your collections.
Product Categorization and Customer Behavior
Categorize products in sub-collections based on customer behavior and preferences.
Analyze shopping patterns to create categories that resonate with your audience. This method can lead to increased engagement and sales.
Conclusion: How To Add Sub Collections In Shopify
Adding sub collections can be more tricky on Shopify than you first might think. However, the steps above will help. If you’re unsure about how to do this, and would not like to touch any coding, then you could download this app. It will help you add sub collections without any coding.
-
Can I limit the number of products displayed in a sub-collection in Shopify?
Yes, you can limit the number of products displayed in a sub-collection by editing the collection settings or using pagination in your store’s theme.
-
Can sub-collections affect the loading speed of my Shopify store?
Yes, sub-collections can impact loading times if not set up efficiently. It’s crucial to optimize images and manage inventory levels to maintain quick page loads.
-
How can I measure the success of my sub-collections in Shopify?
Success can be measured by analyzing traffic, sales data, and customer feedback specific to each sub-collection. Utilize Shopify’s analytics to track these metrics over time.

 PageFly Landing Page Builder
  Shopify
  SEMrush
  Website Maintenance
  UpPromote